
Only available for Logged-in member. Please login or register to access this information.Or use the Temporary User that we have provided to you via email.
expiry time
Item codes | FW Released Date | Changes Information |
|---|---|---|
WSSFC-AG-01 | 06/01/2023 | Firmware for new IC. Add alarm and calibration |
1
QUICK INSTALLATION GUIDE
1.1 Introduction
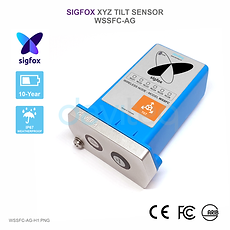
WSSFC-AG is a Sigfox Tilt Sensor, can be used to measure tilt angles X, and Y any object as Tower, Building, Tree, Electricity Tower, Telecom Tower, Bridges... The Ultra-Low Power Power design and smart firmware allow the sensor to last up to 10 years with 02 x AA battery (depending on configuration). The sensor will transmit data in kilo-meters distance to Sigfox basestation. WSSFC-AG can support all regions of Sigfox network in over the World, RC1, RC2, RC3, RC4, RC5, RC6, RC7.
How the sensor connect to system?

System components:
The end nodes are Sigfox-Ready Sensors or Actuators;
The Sigfox Base Stations (installed and operated by Sigfox Operator);
The Sigfox Back-End (Operated by Sigfox Company);
The Application Server is the destination software users want to utilize the data from/to Sigfox-Ready sensors/ actuators.
How do you set up the Sigfox-Ready device and get its data to the Application Software? Please follow these steps:
Contact the local Sigfox Operator to sign a Data plan contract. You will be provided an account;
Log in to the Sigfox Back-end by your own account then add the Sigfox-Ready Devices. Please follow the guidelines of Sigfox back-end;
Configure the callback or data forwarding from the Sigfox Back-end to the Application Software. Please follow the guidelines of Sigfox back-end;
Once the payload is on the Application server, decode data from Payload. Please check Section 1.9 for the Payload document.
1.2 Application Notes
For Applications
Tilt Monitoring, Facility Monitoring, Flood Monitoring, Infrastructure Monitoring, Level Monitoring, Machine Health Monitoring, Safety Monitoring
Notes
Tilt Range: Match the angle range to your needs (e.g., ±45°, ±90°).
Accuracy & Resolution: Higher values for precise applications.
Axes: Single or multi-axis depending on complexity.
Sensor Type: Mechanical (simple) vs. MEMS (advanced).
Environment: Check temperature, waterproofing, and shock resistance.
Power: Ensure voltage/current match your system.
Size & Mounting: Fit your design and installation needs.
1.3 When does device send Uplink messages?
The device will send uplink messages in the following cases:
Case 1: After power-up in the 60s, the device will send the first message called START_UP. The payload will tell the user the HW version, FW version, and current configuration of the device;
Case 2: Then, in every interval time (pre-configured), for example, 10 minutes, it will send the message called CYCLIC_DATA. The payload will tell the user the following data like measured values, battery level, and alarm status...
To change the cycle of data sending, you can change the value of the parameter: CYCLIC_DATA_PERIOD (default is 600 seconds).
Case 3: If ALARM_ENABLED=1, the device will send ALARM message immediately when device switches from Normal state to Alarm state. It will repeat sending ALARM messages in predefined ALARM_PERIOD time interval (default is 10 minutes) if the Alarm state still exist;
Case 4: During the commissioning, testing, or calibration sensor, the user can force the device to send the uplink message to get the data immediately. This message is called FORCE_DATA. The payload will provide data like raw measured value, scaled measured values, battery level, and alarm status... It can be forced by applying the magnet key on the reed switch in 1s;
Case 5: If users want to change the configuration immediately, they don't need to wait until the next cyclic data-sending message; instead, they can force the device to send a special uplink message so that the device can get the new downlink message. This uplink message is named PARAMETERS_UPDATE. It can be forced by applying the magnet key in more than 5s.
Case 6: In every interval time (pre-configured), for example, 24 hours, it will send the message called HEARTBEAT. The payload will tell the user the following data like hardware version, firmware version, current sensor configuration
1.4 Default Configuration
There is no configuration required for the AG Tilt Sensor. There is only configuration for the main device (Sigfox device, LoRaWAN device, Sub-GHz device...). Please refer to the configuration table of the main device.
1.5 Battery/ Power Supply
The Device uses below batteries:
Battery type: Primary battery
Battery size and Voltage: AA 1.5VDC
Number of batteries: 02
Recommended batteries: Energizer® L91 or equivalent from Duracell®;

Please take note on the Polarity of the batteries as below picture.

Understanding the Battery Levels:
Level 3 (4 bars): battery energy is 60-99%
Level 2 (3 bars): battery energy is 30-60%
Level 1 (2 bars): battery energy is 10-30%
Level 0 (1 bar): battery energy is 0-10%
Note: to display accurately the remaining energy of battery, please configure the correct BATTERY_TYPE by downlink type 5 or offline cable. Please check the section Principle of Operation for more details.
1.6 What's in the Package?

1.7 Guide for Quick Test
With the default configuration, the device can be connected quickly to the Sigfox Network by the following steps.
Step 1: Prepare the values of communication settings
Device ID: Get Devive ID on the device nameplate
Device PAC: Get Devive PAC on the device nameplate
Note: All Sigfox sensors are pre-configured with the correct RC before delivery. The settings of Device ID, Device PAC, and RC could also be read from the device memory map. Please reference Section 3.2 Sensor configuration for details.
Step 2: Add the device to the Sigfox Backend
Please refer to the below Section 1.10 for details.
Step 3: Install the batteries to the device
Please refer to Section 1.5 above for instructions on battery installation.
After installing the battery in 60 seconds, the first data packet will be sent to the Sigfox network. After receiving the first data packet, the time of another packet depends on the value of the parameter: CYCLIC_DATA_PERIOD. Additionally, you can use a magnet key to touch the magnetic switch point on the housing within 1 second to initiate force packet of the device to send data instantly and the LEDs on the housing will be lit with SKY BLUE color.
Note:
If the device is required to connect to the external power, the correct external power supply must be connected to the device power connector. Refer section 1.8 INSTALLATION for details of the power wiring
If the device is required to connect to external sensor, the connection must be implemented before power up. Refer section 1.8 INSTALLATION for details of the wiring
If device is required the calibration for correct measurement, the calibration must be implemented. Refer detail at section 3.3 Calibration/ Validation.
Step 4: Decode the payload of the receiving package
Please refer to Section 1.9 Payload Document and Configuration Tables for details of decoding the receiving packet to get the measured values.
1.8 Installation
Dimension Drawings and Installation Gallery (Photos and Videos)

Please follow the checklist below for a successful installation:
1. Have you studied the dimensions of the device as above drawings?
2. Have you tested and make sure the device have been connected successfully as Section "1.7 Guide for Quick Test" above?
3. Have the device been configured properly as per Section 3.2 below?
4. Have the device been calibrated or validated as per Section 3.3 below?
5. Then you can start to install the device at site. Please check the following Installation Notes for Sensor Part (if available) before installation.
Installation Notes for Sensor Part (if available)
The AG sensor is built-in with the main device. Therefore please refer to the installation procedure for the main device as below:
- Install at zero position X=0, Y=0, Z=0 of sensor tilt for AG-01, AG-02 and X=0, Y=0 for AG-03
- Max range of AG-03 are -30~30°
Installation Guide for Main Device
Check the Location for the best RF Signal
Make sure the site is good enough for RF signal transmission.
Tip: To maximize the transmission distance, the ideal condition is Line-of-sight (LOS) between the device (wireless part) and the Base station. In real life, there may be no LOS condition. However, the device still communicates with the Base station, but the distance will be reduced significantly.
DO NOT install the wireless sensor or its antenna inside a completed metallic box or housing because the RF signal can not pass through the metallic wall. The housing is made from Non-metallic materials like plastic, glass, wood, leather, concrete, and cement… is acceptable.
Mounting the Device on the Wall or Pole
Mount the sensor onto a wall by the mounting bracket as below pictures

1.9 Payload Document and Configuration Tables
Please click below button for:
-
Payload decoding of Uplink messages;
-
Payload encoding of Downlink messages;
-
Configuration Tables of device.
Note:
If the content of below web payload, memory map, and sample decoder could not be copied, please install the extension of "Enable Copy Paste - E.C.P" for Microsoft Edge and for Google Chrome.
1.10 How to connect device to Back-end/ Network Server/ Coordinator
This instruction is applied to all kinds of Sigfox-Ready sensor produced by Daviteq.
Step 1: Log in to the sigfox backend website

Step 2: Click on Device

Step 3: Click New → Select a group

Step 4: Fill in the required information

Note: Some of our products may not have end product certification in time, to add the product to Backend Sigfox please follow the steps below.
Click on the text as shown below

Check the box as shown below to register as a prototype

2
MAINTENANCE
2.1 Troubleshooting
Please find below the steps to identify the problems from the Communication Part or Sensor Part:
If the device cannot connect to the Gateway, or System, or Coordinator the first time, it is the Communication Problem;
If the device status like battery, RSSI level, data status, or other communication is normal, but the measured values are not updated or wrong, it would be the problems of the Sensor part;
If the data coming to the gateway, system, or coordinator is not frequent as expected, the problem would be Communication.
Please refer to the troubleshooting guide for the Communication and Sensor Part below.
Troubleshooting for Communication
Troubleshooting for Sensor Part (if available)
2.2 Maintenance
Maintenance for Main device
There is no requirement for maintenance of the Hardware of this Sigfox-Ready device except:
1. The battery needs to be replaced. Please check the battery status via uplink messages;
Note: When the battery indicator shows only one bar (or 10% remaining capacity), please arrange to replace the battery with a new one as soon as possible. If not, the battery will drain completely, and the resulting chemical leakage can cause severe problems with the electronic circuit board.
2. Sensor, please refer to the maintenance section of the sensor document.
Maintenance for Sensor part (if available)
There are no moving parts or consumed parts in the AG Tilt Sensor. Therefore there is no need to do maintenance.
3
ADVANCED GUIDE
3.1 Principle of Operation
Principle of Operation for Device WSSFC-AG | FW3
The Daviteq Sigfox AG Tilt Sensor comprises 02 parts linked internally:
The Daviteq Sigfox wireless transmitter;
The Daviteq AG tilt sensor; (measures the Acceleration of the 3-axis. Please check the below section for a detailed description of this sensor)
What are the primary output values?

X-axis tilt angle: Measured tilt versus X axis. This parameter is used for alarm. This value equals X_TILT_VALUE_X10 (in the payload) divided by 10
Y-axis tilt angle: Measured tilt versus Y axis. This parameter is used for alarm. This value equals Y_TILT_VALUE_X10 (in the payload) divided by 10
Z-axis tilt angle: Measured tilt versus Z axis. This parameter is used for alarm. This value equals Z_TILT_VALUE_X10 (in the payload) divided by 10
Alarm Status: When the absolute difference between X_TILT_VALUE and X tilt reference OR between Y_TILT_VALUE and Y tilt reference OR between Z_TILT_VALUE and Z tilt reference are greater than the alarm thresholds, the alarm will occur. The value of X tilt reference, Y tilt reference and Z tilt reference are the tilt values when SET_REF_POS_FOR_ALARM is set to 1.
Please check the payload document for more details.
What are the secondary output values?
Below output values are useful for device maintenance and troubleshooting.
Battery level (%): to understand the remaining capacity of the battery. This parameter in the payload is BATTERY_LEVEL.
Sensor error code: to understand whether the sensor is working properly or not. This parameter in the payload is HW_ERROR
Sensor current configuration: to understand what is the current setting of the sensor. This parameter in the payload is LASTEST_SIGFOX_DONWLINK
Hardware version and Firmware version: to understand the product version: parameter in the payload is HW_VERSION and FW_VERSION
Principle of operation
Most of the time, the Sigfox device will be in sleep mode. When the timer reaches the Measure_Period (for example, 2 minutes), it will wake up the device to start the measurement.
*** This Measure_Period will affect the energy consumption of the device.
The measurement will take a certain time to finish; it can take milliseconds or seconds to finish the measurement. This measurement time depends on sensor type, required accuracy, and other factors. Shorter measurement time, lower energy consumption, and longer battery life.
After finishing the measurement cycle, the device can read the tilt angles X, Y, and Z. Then it calculates the more parameters as below:
Delta_X: is the differential between measured tilt angle X with the Reference_Angle_X;
Delta_Y: is the differential between measured tilt angle Y with the Reference_Angle_Y;
Delta_Z: is the differential between measured tilt angle Z with the Reference_Angle_Z;
Note: after installing the device at field, need to perform a Downlink Type 5 command to write value 1 to parameter SET_REF_POS_FOR_ALARM (please check address in Payload document) to allow device get the Reference Position for Alarming function.
If parameter ALARM_ENABLE = 1
Then the device will compare the Delta_X, Delta_Y or Delta_Z with High_High_Alarm_Setpoint and High_Alarm_Setpoint, together with Hysteresis to define the state of the device is No_Alarm or Hi_Alarm or HiHi_Alarm.
*** Hysteresis value is to avoid the flickering status (Alarm/No-Alarm toggling quickly) when the measured value close to alarm threshold. The hysteresis equal 0 in this firmware.

If an axis is in Blue color area of above graph, the device is in Normal or No_Alarm state;
If an axis is in Red color area, the device is in HiHi Alarm state (Alarm 2);
None of above 02 states, the device will be in Hi Alarm state (Alarm 1).
How the device send uplink message base on above 03 states?
If Device state is No_Alarm, it will check the timer to reach the Cyclic_Data_Period to send the CYCLIC_DATA uplink message;
If Device state is changed from No_Alarm to Hi Alarm or HiHi Alarm, it will send alarm message immediately. Please check the below picture to understand the operation flow when finishing the measurement cycle:

Once alarm happened and send the first alarm message, the device will send the next alarm message in the Alarm_Period if the device is still in Alarm states (Hi Alarm or HiHi Alarm). Please check below picture to understand the operation flow when the Alarm timer reaches the Alarm_Period.

If parameter ALARM_ENABLE = 0
The device will check the timer to reach the Cyclic_Data_Period to send the CYCLIC_DATA uplink message;
How to apply the Alarm function?
The Alarm function is OFF by default (parameter ALARM_ENABLE = 0).
The Alarm function is only working properly for the installation positions as below pictures.
To activate the Alarm function, please follow the below steps:
Install the device at the field as above directions, and fix it on the desired location;
Use one command from Downlink type 5 to write value "1" to parameter SET_REF_POS_FOR_ALARM (please check the address in the Payload document) to allow the device get the Reference Position;
Use one command from Downlink type 0 to write the following parameters:
HH_alarm_Setpoint: Setpoint for HiHi Alarm threshold (in degree);
High_alarm_Setpoint_Factor: a factor to set the Hi Alarm threshold;
Alarm_Enable = 1 to allow alarm function;
Alarm_Period = time interval between sending the repeat alarm message.
How to understand and calculate the Alarm Thresholds?
The parameter HH_Alarm_Setpoint is for setting the threshold of HiHi Alarm, unit is degree.
The parameter High__Alarm_Setpoint_Factor is for setting the threshold of Hi Alarm, unit is %.
For example:
HH_Alarm_Setpoint = 5 ==> HiHi Alarm = 5 degree;
High_Alarm_Setpoint_Factor = 100 ==> Hi Alarm = 5 x 100/200 = 2.5 degree.
It means:
The device will send Hi Alarm when the Difference between the measured value and Reference position is larger than 2.5 degrees and less than 5.0 degrees;
The device will send HiHi Alarm when the Difference between the measured value and Reference position is larger than 5.0 degrees;
Offset the position
The LoRaWAN Tilt sensor is factory calibrated at the below position.

After installation at the field in the same direction, the user can offset the error for all 03 axes so that it can deliver the standard Tilt angles as above. To do that, please follow the below step:
Using the Downlink Type 5 to write value "1" to the parameter CALIB_ENABLE
Please check the Payload document to understand clearly about uplink messages, downlink messages, meaning of parameters for configuration...
Principle of Operation of Sensor part (if available)
AG utilizes the three-axis high-accuracy MEMS acceleration sensor to calculate the static Euler angles of the object it is mounted on.

The microprocessor of the Wireless transmitter will capture the raw signal of 3-axis acceleration the calculate the tilt angle of X, Y, and Z. Here are the final output values of the device.
X Tilt value
16-bit signed integer
X_TILT_VALUE = X_TILT_VALUE_X100 / 100 for AG-01 and AG-02
X_TILT_VALUE = X_TILT_VALUE_X1000 / 1000 for AG-03
Range: -90.00 to 90.00 for AG-01 and AG-02; -30.000 to 30.000 for AG-03
Y Tilt value
16-bit signed integer
Y_TILT_VALUE = Y_TILT_VALUE_X100 / 100 for AG-01 and AG-02
Y_TILT_VALUE = Y_TILT_VALUE_X1000 / 1000 for AG-03
Range: -90.00 to 90.00 for AG-01 and AG-02; -30.000 to 30.000 for AG-03
Z Tilt value
16-bit signed integer
Z_TILT_VALUE = Z_TILT_VALUE_X100 / 100 for AG-01 and AG-02
No Z_TILT_VALUE for AG-03
Range: -90.00 to 90.00 for AG-01 and AG-02
Default Configuration Parameters of Sensor part (if available)
There is no configuration required for the AG Tilt Sensor. There is only configuration for the main device (Sigfox device, LoRaWAN device, Sub-GHz device...). Please refer to the configuration table of the main device.
3.2 Configuration
How to configure the device?
Sensor configuration can be configured in 02 methods:
Method 1: Configuring via Downlink messages.
Method 2: Configuring via Offline cable.
Note: The sensor is only active for offline configuration in the first 60 since power up by battery or plugging the configuration cable.
Which Parameters are configured?
Please check Part G in Section 1.9 Payload Documents above.
Method 1: Configuration via Downlink messages
Please check the Part D & E in Section 1.9 Payload Documents above.
Method 2: Configuration by Offline Cable
Please download the Configuration Template File of this sensor to be used in Step 4 below.
Instructions for offline configuration of the Daviteq LoRaWAN sensors. Please follow the following steps.
Note: The sensor is only active for offline configuration in the first 60 since power up by battery or plugging the configuration cable.
1. Prepare equipment and tools
The following items must be prepared for configuration.
A PC using the Windows OS (Windows 7 or above versions). The PC installed the COM port driver of the Modbus configuration cable (if needed). The driver is at link: Modbus Configuration Cable COM port driver for PC and the instruction to install the driver at link: How to install the driver.
A Modbus configuration cable
Tools to open the plastic housing of LoRaWAN sensors (L hex key or screwdriver)
2. Download and launch Daviteq Modbus configuration software
Click the link below to download Daviteq Modbus configuration software:
https://filerun.daviteq.com/wl/?id=yDOjE5d6kqFlGNVVlMdFg19Aad6aw0Hs
After downloading the software, unzip the file named: Daviteq Modbus Configuration.zip and then copy the extracted folder to the storage drive for long-term use.
Open the folder, double click on the file Daviteq Modbus Configuration Tool Version.exe to launch the software and the software interface as below:

Note: The software only runs on Microsoft Windows OS (Windows 7 and above).
3. Connect the cable and configure the sensor
Step 1:
Connect the PC to the sensor using the configuration cable.
- Use the configuration cable (Item code: TTL-LRW-USB-01).

- Connect the USB-A plug into the USB-A socket of the PC.

Step 2:
On the configuration software, choose the relevant Port (the USB port which is the cable plugged in) and set the BaudRate: 9600, Parity: none
Step 3:
Click Connect button to connect the software to the sensor. After successful connection, the Connected status will show on the software.

Step 4:
Import the configuration template file of the sensor (as above link) to the software: click menu File/ Import New and then browse the relevant sensor template file (csv file) and click Open to import the template file.
Note: The sensor is only active for configuration for 60 seconds since plugging the configuration cable or the power supply into the sensor.
Each sensor type has its own template file. Refer to the sensor's manual to download the correct file.
Step 5:
Open the housing of the sensor and quickly plug the connector of the configuration cable into sensor's modbus configuration port as below figure. After plugging the connector, the software will read the parameter values automatically.

Plug the cable connector into sensor's modbus configuration port. This port is located at a different location, depends on the sensor type.
Note: If the sensor has SKU of WSSFCEX-PPS and hardware version 1 &2, the sensor must be powered by batteries for configuration
Step 6:
Read the current value of the parameter with Modbus Function 3
At the relevant row of the parameter, check box 3 on column Func to read the value of the parameter. The read value is shown in VALUE ON MEMMAP column.

The sensor is only active for configuration for 60 seconds since plugging the configuration cable or the power supply into the sensor. After 60 seconds, the TIME_OUT text will show on EXCEPTION column of the software.
Step 7:
Write the new setting to the parameter with Modbus Function 16
Double click on the column VALUE TO WRITE of the parameter and input the new setting value of the parameter;
Uncheck the tick on the FC column of the parameter, click on the arrow, select 16 and then check on the FC column to write a new setting to the parameter. The WRITE_OK text will show on EXCEPTION column if the software successfully writes the setting.

Repeat Step 6 to read the setting of the parameter for double-checking.
Note: For some critical parameters of the sensor, the password in "password for setting" must be written before writing the new settings to these parameters.
Only read/ write registers are allowed to write.
The sensor is only active for configuration for 60 seconds since plugging the configuration cable or the power supply into the sensor. After 60 seconds, the TIME_OUT text will show on EXCEPTION column of the software.
4. Troubleshooting
3.3 Calibration/ Validation
How to force sensor to send data for calibration/ validation (if available)
By using the magnet key, the Sigfox node can be triggered to send data to base station immediately. There will be a beep sound from the buzzer meaning the data has been sent (Buzzer will be updated in the latest version).

Note:
Once sending the data to base station by the magnet key, the timer of sending time interval will be reset;
The shortest time interval between the two manual triggers is 15s. if shorter than 15s, there will be no data sending.

Calibration/ Validation sensor (if available)
The Daviteq AG sensor is factory calibrated. The user may need to perform the zero-ing after installation.
For AG-01 and AG-02 sensor:
To do the Zero-ing, the device must be installed in this direction with max ±5° deviation from Gravity direction.

After fixing the device, please perform the Zero-ing command on the main device (depending on the type of device, which is Sigfox or LoRaWAN or Sub-GHz...).
For AG-03 sensor:
The device is calibrated in 3 positions:
1. X tilt and Y tilt equal 0°
2. X tilt equals +30°
3. Y tilt equals +30°
After fixing the device, please perform the CALIBRATION_TILT_ENABLE command on the main device (depending on the type of device, which is Sigfox or LoRaWAN or Sub-GHz...).
4
PRODUCT SPECIFICATIONS
4.1 Specifications
Spec
5
WARRANTY & SUPPORT
5.1 Warranty
Warranty
Below terms and conditions are applied for products manufactured and supplied by Daviteq Technologies Inc.
Free Warranty Conditions
The manufacturer undertakes to guarantee within 12 months from shipment date.
Product failed due to defects in material or workmanship.
Serial number, label, warranty stamp remains intact (not purged, detected, edited, scraped, tore, blurry, spotty, or pasted on top by certain items).
During the warranty period, if any problem of damage occurs due to technical manufacturing, please notify our Support Center for free warranty consultancy. Unauthorized treatments and modifications are not allowed.
Product failed due to the defects from the manufacturer, depending on the actual situation, Daviteq will consider replacement or repairs.
Note: One way shipping cost to the Return center shall be paid by Customers.
Paid Warranty
The warranty period has expired.
The product is not manufactured by Daviteq.
Product failed due to damage caused by disasters such as fire, flood, lightning or explosion, etc.
Product damaged during shipment.
Product damaged due to faulty installation, usage, or power supply.
Product damage caused by the customer.
Product rusted, stained by effects of the environment or due to vandalism, liquid (acids, chemicals, etc.)
Product damage is caused by unauthorized treatments and modifications.
Note: Customers will be subjected to all repairing expenses and 2-way shipping costs. If arises disagreement with the company's determining faults, both parties will have a third party inspection appraise such damage and its decision be and is the final decision.
5.2 Support
Support via Help center
If you need our support for Daviteq device's installation, configuration, test, and decode, please input support request at link: https://forms.office.com/r/XWHbYG7yy7
Our support engineer will contact you via email or the support ticket system.
If you have any questions about the product, you can search for information on our web (https://www.iot.daviteq.com/). If you can't find the right information, please register an account and send us a request at link Contact us | Daviteq Technologies . We will respond within 24 hours.